Laser Cutting Blog Entry
Laser Cutting Documentation Blog Entry
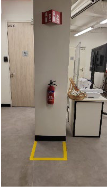
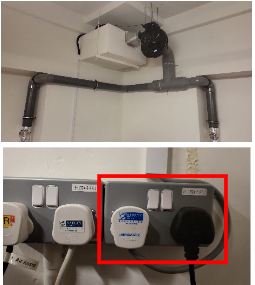
- The 4 important hazards associated to the operation of laser cutting machine and their respective safety control measures (administrative/engineering control).
- The materials that can be cut and can’t be cut using laser cutting machine.
- The steps including pictures on the operation of UNIVERSAL laser cutter, that consist of:
a. Starting the compressor, turning on the laser cutter machine and fume extractor.
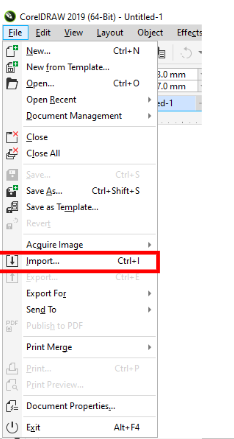
b. Importing a .DXF file to coreldraw and modify the lines/fill for cutting and engraving.
c. Sending the coreldraw drawing to laser cutter software and setting the laser cutter power, speed, PPI in the software.
d. Starting the job on the laser cutter machine.
e. DOs and DONTs when there’s flame/fire on the material being cut. - My Learning reflection on the laser cutter activities.
- These are the 4 important hazards and the respective safety control measures on the operation of laser cutting machine:
| Hazards | Safety Control Measures | Pictures to support the explanation |
|---|---|---|
| 1. User may get burnt by the laser | Engineering
Administrative
|
|
| 2. User may suffer eye damage from the laser beam | Administrative
|
|
| 3. Material may catch on fire | Engineering
Administrative
|
|
| 4. Toxic fumes from the laser cutter | Engineering
Administrative
|
2. Below are the materials that can be cut/engraved using laser cutting machines in FabLab
| Material | Photo of Material |
|---|---|
| 1. Acrylic | |
| 2. Plywood (Laserply) | |
| 3. Cardboard |
Below are the materials that can't be cut/engraved using laser cutting machine in FabLab
| Material | Photo of Material |
|---|---|
| 1. Metal | |
| 2. Foam | |
| 3. Rubber |
| Steps and description | Photos to support description |
|---|---|
| 1. Turn on switches for: laser cutter, air assist and extractor |
|
| 2. Turn on switches for: fume extractor |
| Steps and description | Photos to support description |
|---|---|
| 1. Importing a .DXF file to coreldraw [Select file > Import > Select .DXF file > Import] |
|
| 2. Choose settings for vector cut/engrave/vector engrave Vector cut Pen outline colour: RGB Red Line width: Hairline Engrave Fill colour: RGB Green Line width: None Vector engrave Pen outline colour: RGB Green Line width: Hairline Fill colour: None |
| Steps and description | Photos to support description |
|---|---|
| 1. Click on File > Print | |
| 2. Click on the cogwheel icon for settings | |
| 3. Universal's Material settings will appear Click on LOAD for more material settings |
|
| 4. Select the presets that matches your material type and thickness Select OPEN |
|
| 5. Details on certain settings POWER: describes the output power of the laser. 100% is maximum power (will cause ugly charring). For dark wood engravings or stamp engravings, you generally need high power, whereas low values are used for materials such as paper. SPEED: describes the movement of the laser head. Fast speeds lead to short exposure times, slow speeds lead to long exposure times. PPI: Pulses Per Inch, Frequency may also be known as PPI or pulses per inch and is a way to control how many times the laser pulses over a given distance during the cutting process. The higher the frequency the more pulses you have and the more they will overlap resulting in a smoother cut, however the downside to this is that the higher the frequency the more heat it creates while cutting which can cause melting or charring on certain materials. Z-Axis: Usually set as the material height for optimal focus point |
|
| 6. Click OK |
e. DOs and DONTs when there’s flame/fire on the material being cut.
| DOs and DONTs | Photos to support description |
|---|---|
1. DOs:
B. place it on the floor and step on it to put out the fire
go to the closest fire extinguisher and put it out. Get people’s attention by shouting for help. |
|
2. DONTs:
|
- |
Below is my Learning Reflection on the laser cutter activities.


Comments
Post a Comment